Skip to content
Smart AC Solutions
  • CategoriesExpand
    • AC Troubleshooting
    • Air ConditionerExpand
      • Portable Air Conditioners
      • Room Air Conditioners
      • Split System Air Conditioners
      • Window Air Conditioners
      • Reviews & Prices
    • Thermostat Solutions
    • Calculator
  • Directory
  • Request HVAC Service
  • Join Our Pro NetworkExpand
    • HVAC BusinessesExpand
      • Residential
      • Commercial
      • Emergency Services
    • Add Business
  • Register
  • Login
  • Forgot Password?
Smart AC Solutions
Air Conditioner

Carrier AC filter location and replacement

ByRalph P. Sita Updated onJune 29, 2026


The air filter in your Carrier air conditioner is typically located behind the front grille of the unit or inside the blower compartment near the furnace. Depending on your model, it may sit vertically in a frame or slide horizontally into a housing. The exact location varies—some Carrier units house the filter near the top of the unit, others place it on the side. Your equipment manual specifies the exact location for your model. Checking monthly and replacing the filter every 90 days (or more frequently in dusty conditions) keeps your system running efficiently and maintains indoor air quality.

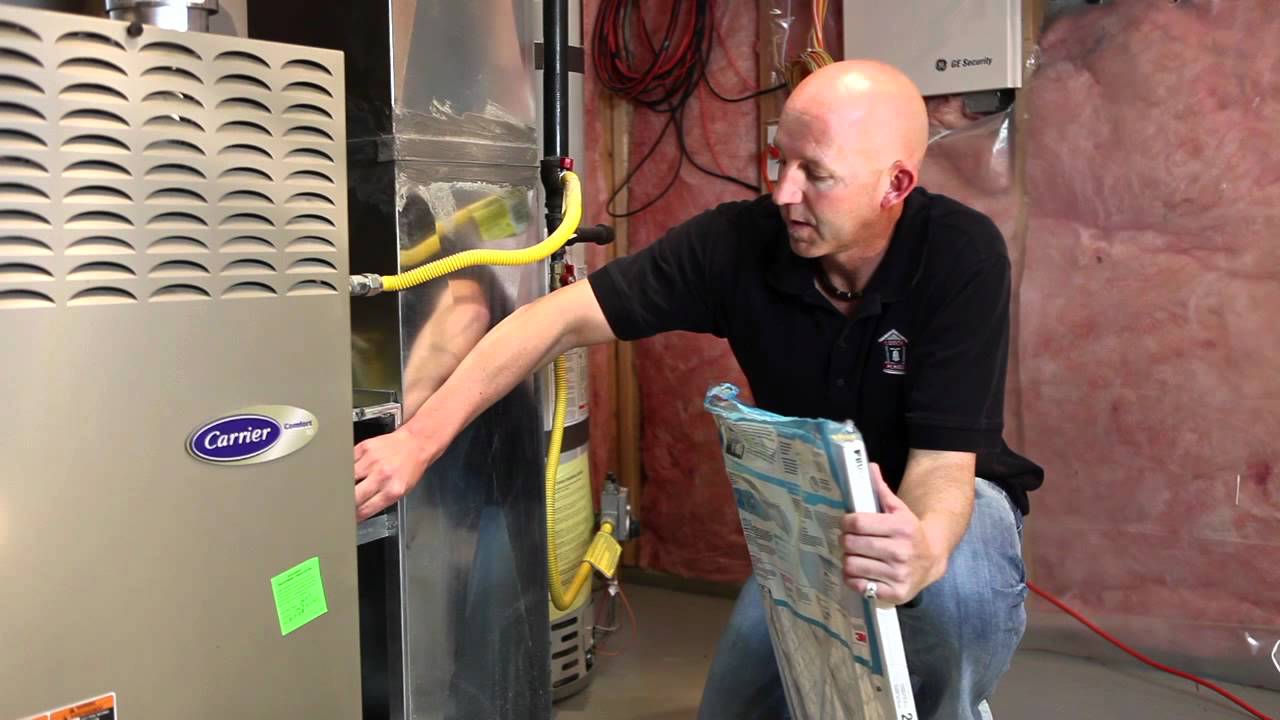
Where is the Filter on My Carrier Air Conditioner
Credit: www.youtube.com

Page Contents

Toggle
  • Carrier Air Conditioner Filter Replacement Steps
  • Carrier AC Filter Size and Specifications
  • Finding Your Carrier Filter Model-Specific Locations
  • Carrier FB4CNP030 Filter Location
  • Where Is the Air Filter on a Carrier Air Conditioner?
  • How Do I Change the Filter on My Carrier Unit?
  • Where Is My Carrier Furnace Filter Located?
  • How to Service Indoor AC Unit Carrier
  • Next Steps
  • Frequently Asked Questions
    • Related Articles

Carrier Air Conditioner Filter Replacement Steps

Filter replacement is straightforward. First, locate the filter compartment—on most Carrier units, it’s behind the front access panel. Turn off the AC before beginning. Open the compartment carefully and note how the old filter is oriented (look for arrows showing airflow direction). Remove the old filter by pulling it straight out. If it’s dirty, you’ll immediately see dust accumulation.

Inspect the compartment and vacuum out any loose debris. Take your new filter and check the dimensions match the old one (they’re usually printed on the frame: 16x25x1, 20x25x4, etc.). Orient the new filter correctly—airflow arrows on the frame must point toward the indoor unit, away from the return air. Insert the filter fully into the compartment until it seats firmly. Close the compartment and turn the AC back on. Mark your calendar for the next replacement (usually 90 days).

Carrier AC Filter Size and Specifications

Carrier air conditioner filters come in several standard sizes. The most common are 1-inch thick (standard), 4-inch thick (high-capacity), and 5-inch thick filters. The first dimension is width, the second is height, and the third is depth. Common sizes include 16x25x1, 20x25x1, 16x25x4, and 20x25x4. Your Carrier system’s manual lists the correct size for your model. If you don’t have the manual, remove the old filter and read its dimensions off the frame—that’s your replacement size.

Air conditioner filters remove dust, pollen, pet dander, and airborne particles. A clean filter improves indoor air quality, reduces allergens, and allows your AC to run more efficiently. Dirty filters restrict airflow, forcing your compressor to work harder, raising energy bills and shortening equipment life. Replacing your filter regularly (every 90 days, or monthly in dusty climates) is the simplest preventive maintenance you can do.

Finding Your Carrier Filter: Model-Specific Locations

Carrier manufactures both window units and central AC systems. Window unit filters are typically on the front face, just behind the removable filter cover. Central system filters are located in the blower compartment, usually in the furnace/air handler unit. The air handler is often in an attic, basement, or closet. If you can’t locate it, follow the ductwork from your indoor vents backward—it leads to the air handler. Once you find the unit, the filter is inside a compartment near the blower motor or return-air duct.

Some Carrier models place the filter between the return-air duct and the blower, while others house it in a filter rack on the side of the unit. Open the access panels on your unit and look for a frame holding a pleated or flat-panel filter. That’s your filter compartment. If you’re unsure, your model number (found on the unit’s nameplate or in your documentation) can be entered into Carrier’s online filter lookup tool to confirm size and location.

Carrier FB4CNP030 Filter Location

The Carrier FB4CNP030 (and similar “FB4” models) house the filter in the blower unit. Locate the blower unit—it’s usually in the attic, basement, or a utility closet. Once you find it, open the front access panel. The filter sits inside a compartment, typically on the side or bottom of the blower housing. Remove the old filter by unlatching or sliding it out, depending on your model’s design. Clean the compartment of any dust, insert the new filter with arrows pointing toward the blower (not away from it), and secure it in place.

Where Is the Air Filter on a Carrier Air Conditioner?

On Carrier air conditioning units, the air filter is located in the blower compartment, typically behind the return-air grille or inside the ductwork near the furnace/air handler unit. For window units, the filter is on the front face. For central systems, the blower compartment is accessed by removing panels on the air handler unit itself. The filter is held in a frame or rack, making removal and replacement straightforward. The specific location depends on your unit’s design—consult your manual if you’re uncertain.

How Do I Change the Filter on My Carrier Unit?

Changing your Carrier air conditioner filter is a simple DIY task requiring no tools. First, turn off the AC system. Locate the filter compartment (consult your manual if needed). Open the compartment panel and remove the old filter by pulling it straight out. If it’s stuck, gently wiggle it side-to-side while pulling. Examine the old filter—heavy dust indicates you’re overdue for replacement.

Place the new filter into the compartment, ensuring the airflow arrow on the filter frame points toward the blower (not toward the return duct). Make sure the filter sits fully in the frame with no gaps around the edges—air will bypass a poorly seated filter, reducing its effectiveness. Close the compartment panel and turn the AC back on. If your system has a filter-change indicator light, reset it according to your manual’s instructions (usually a simple button press).

Where Is My Carrier Furnace Filter Located?

The Carrier furnace filter is located in the blower compartment, which is the same location as the AC filter on combo furnace/AC units. In heating-only furnaces, the filter is still in the blower section. The blower compartment is typically accessible by removing a panel on the front or side of the unit. The filter sits in a frame or cartridge holder. Once you open the compartment, the filter is immediately visible. If your unit is in an attic or crawl space, bring a flashlight and wear appropriate clothing for the space. Filter location is standardized across most Carrier furnaces—once you find it on one unit, you’ll recognize it on others.

How to Service Indoor AC Unit Carrier

Next Steps

Locate your Carrier air conditioner’s filter today by checking behind the front grille or in the blower compartment. Check its condition—if it’s visibly dusty or clogged, replace it immediately. Mark your calendar for filter checks every month and replacement every 90 days. Regular filter maintenance is the cheapest way to keep your AC running efficiently, reduce energy costs, and extend equipment life. If you can’t locate your filter or don’t know the correct size, consult your owner’s manual or call a Carrier service technician.

Frequently Asked Questions

How often should I replace my Carrier AC filter?

Standard 1-inch filters should be replaced every 90 days (3 months). In dusty conditions, high-pollen seasons, or homes with pets, replace monthly. 4-inch and 5-inch filters last longer—typically 6-12 months. Check your filter monthly regardless; if it’s visibly clogged with dust before the recommended interval, replace it early. A very dirty filter reduces efficiency and stresses your system.

What’s the difference between standard and high-capacity filters?

Standard 1-inch filters are the minimum and need frequent replacement. 4-inch filters offer higher dust capacity and last 3-4 times longer, reducing replacement frequency. 5-inch filters offer even more capacity. The tradeoff is cost—thicker filters cost more upfront but save money long-term due to fewer replacements. They also allow slightly better airflow due to larger surface area. Upgrade to a 4-inch or 5-inch filter if your unit supports it and you want less frequent maintenance.

Can I use a filter different from my unit’s specifications?

No. Your filter must match your unit’s dimensions exactly. A smaller filter won’t seal properly and air will bypass it. An oversized filter won’t fit or will bend. Always use the exact size stamped on your old filter or listed in your manual. If you’re unsure, remove the old filter and take it to an HVAC supply store—they can match it or help you find the correct replacement.

Does a dirty filter affect my energy bill?

Yes. A very clogged filter forces your system to work harder to pull return air through the obstruction. The blower motor works longer, compressor cycles more frequently, and energy consumption rises. A clean filter reduces workload and can lower cooling costs by 5-15% depending on how dirty the filter was. This energy savings often justifies more frequent filter replacement—replacing a filter every 60 days instead of 90 can pay for itself through reduced electricity bills.

5/5 - (2 votes)
Ralph P. Sita
Author: Ralph P. Sita

Ralph P. Sita is a seasoned professional with deep roots in both the HVAC and tech industries. His family’s business, Ralph P. Sita, Inc., is a locally owned and operated HVAC contractor with over 42 years of experience, serving the DC, Maryland, and Virginia areas. The company specializes in residential, commercial, and industrial heating, ventilation, and air conditioning services, offering everything from installation and maintenance to custom ductwork and indoor air quality solutions -www.ralphpsita.com. A former CPA, he spent the last decade as co-founder and co-CEO at Cybrary, a leading platform for cybersecurity and IT training. Cybrary became the largest, most well-known cybersecurity training businesses in the industry under his leadership. Smart AC Solutions is an opportunity to give back to the HVAC community by providing reliable, actionable information on all things heating and cooling.

Related Articles:

  1. How Long Does a Residential Gas Furnace Typically Last? Understanding Lifespan and Replacement Signs
  2. Ac High Pressure Switch Location – The right Location
  3. How Long Does a Residential Gas Furnace Typically Last? Understanding Lifespan and Replacement Signs
  4. How to Clean Carrier Ac Filter?
Ralph P. Sita

Ralph P. Sita is a seasoned professional with deep roots in both the HVAC and tech industries. His family’s business, Ralph P. Sita, Inc., is a locally owned and operated HVAC contractor with over 42 years of experience, serving the DC, Maryland, and Virginia areas. The company specializes in residential, commercial, and industrial heating, ventilation, and air conditioning services, offering everything from installation and maintenance to custom ductwork and indoor air quality solutions -www.ralphpsita.com.

A former CPA, he spent the last decade as co-founder and co-CEO at Cybrary, a leading platform for cybersecurity and IT training. Cybrary became the largest, most well-known cybersecurity training businesses in the industry under his leadership.

Smart AC Solutions is an opportunity to give back to the HVAC community by providing reliable, actionable information on all things heating and cooling.

Linkedin

Try our new Smart AC Solutions GPT

Description of Smart AC Solutions GPT and link to access.

  • Mastering Whole-Home Ventilation Rate Calculations: A Guide to ASHRAE 62.2 Standards
    by Ralph P. Sita
  • Understanding the Ozone-Based Air Purifier Risks in Occupied Spaces
    by Ralph P. Sita
  • Duct Pressurization Testing (Duct Blaster) Explained: What You Need to Know
    by Ralph P. Sita
  • Optimize Your HVAC Scheduler for Utility Time-of-Use Rates and Slash Energy Bills
    by Ralph P. Sita
  • Ensuring Home Energy Management System (HEMS) Compatibility for Your Smart Home
    by Ralph P. Sita
  • Fresh Air Damper Sizing Guide for Tight Construction: Ensuring Optimal Ventilation
    by Ralph P. Sita

Sites we love:
TrainACE

Facebook Twitter Pinterest YouTube

SmartACSolutions is your go-to source for the latest in heating and air conditioning news, tips, and expert advice.

  • About Us
  • Contact Us
  • Disclaimer
  • Privacy Policy
  • Sitemap

© 2026 Smart AC Solutions । DMCA Protected

SmartACSolutions.com is a property of FieldBin Inc.

Change Location
Find awesome listings near you!
  • Categories
    • AC Troubleshooting
    • Air Conditioner
      • Portable Air Conditioners
      • Room Air Conditioners
      • Split System Air Conditioners
      • Window Air Conditioners
      • Reviews & Prices
    • Thermostat Solutions
    • Calculator
  • Directory
  • Request HVAC Service
  • Join Our Pro Network
    • HVAC Businesses
      • Residential
      • Commercial
      • Emergency Services
    • Add Business
  • Register
  • Login
  • Forgot Password?