Your AC thermostat may not be working due to several common reasons.
Firstly, dead batteries can be a culprit, causing a lack of power to send signals to your HVAC system.
Secondly, faulty wiring can disrupt the connection between the thermostat and the AC unit, leading to malfunctions.
Additionally, accumulated dust and debris within the thermostat can hinder its performance by blocking sensors and buttons.
Lastly, incorrect settings can confuse the thermostat, preventing it from signaling the AC unit to turn on or off as needed.
To resolve these issues, replace depleted batteries regularly, inspect and rewire wiring if needed, clean the thermostat of dust and debris, and double-check and adjust settings.
Addressing these problems can usually restore your AC thermostat’s functionality, maintaining a comfortable indoor environment.
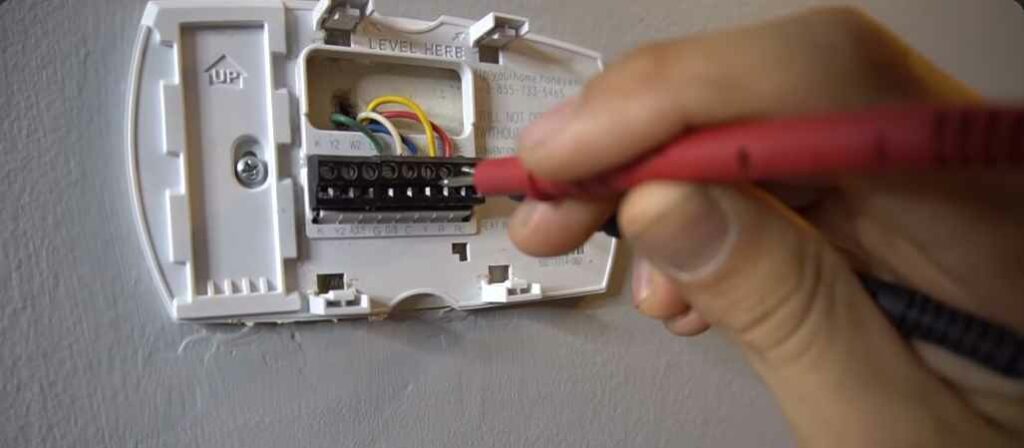
Reasons why your AC thermostat not working properly
Let’s discuss the reasons with the solutions.
Reason 1: Dead Batteries
The thermostat relies on batteries for power, much like a remote control or a flashlight.
When these batteries run out of power, the thermostat can’t function properly.
Imagine it’s like having a TV remote with no batteries – it won’t work because it can’t send signals.
When the batteries are dead, the thermostat can’t send signals to your AC system.
It’s like having a remote control but with no power button.
This means your thermostat can’t tell the AC when to turn on or off, which leads to a lack of control over your home’s temperature.
Solution
- Time Needed: 5–10 minutes
- Equipment Needed: New batteries (typically AA or AAA)
- How to Fix:
- Begin by locating your thermostat on the wall.
- Carefully open the thermostat cover, which is usually designed to be easily accessible.
- Inside, you will find the old batteries. Remove them and make sure to recycle them properly.
- Insert fresh batteries, ensuring the correct alignment with the + and – signs.
- Close the cover gently and wait for the thermostat to turn on. It should regain full functionality.
Reason 2: Faulty Wiring
Wiring in the thermostat is like the connections in a puzzle.
If these connections are wrong or broken, it’s like having puzzle pieces that don’t fit together.
This can confuse the thermostat and prevent it from talking to your AC unit.
Incorrect or damaged wiring can disrupt the communication between your thermostat and your AC system.
It’s like having a phone with a bad connection – you can’t hear each other properly.
As a result, your thermostat can’t tell the AC when to cool or heat your home correctly.
Solution
- Time Needed: 20-30 minutes
- Equipment Needed: Screwdriver, wire strippers (if available)
- How to Fix:
- Turn off the power to your AC and thermostat by switching off the breaker or using the “off” button on your thermostat.
- Open the thermostat cover.
- Check if the wires are loose or damaged. If damaged, you might need an adult’s help.
- If wires are loose, tighten them with a screwdriver.
- If wires are damaged, you may need to replace them. Ask an adult for help if needed.
- Close the thermostat cover and turn the power back on. The thermostat should work properly.
Reason 3: Dust and Debris Buildup
Inside the thermostat, there are tiny sensors and buttons that work together to control your AC.
Over time, dust and debris can accumulate and cover these sensors and buttons, making it hard for them to do their job.
Dust and debris are like a blanket covering the thermostat’s sensors and buttons.
When they can’t “see” or “feel” properly, it’s like trying to play a video game with a dirty screen or a controller covered in sticky residue.
The thermostat can’t sense the temperature or respond to your commands accurately.
Solution:
Time Needed: 10–15 minutes
Equipment Needed: Soft brush or a can of compressed air
How to Fix:
- Turn off the power to your AC and thermostat.
- Gently open the thermostat cover.
- Use a soft brush or a can of compressed air to carefully clean inside. Make sure not to touch the wires.
- Close the cover and turn the power back on. The thermostat should start working better.
Reason 4: Incorrect Settings
Your thermostat has settings that determine when your AC turns on and off.
If these settings are wrong, it’s like setting an alarm clock for the wrong time – your AC won’t cool or heat your home when you want it to.
Incorrect settings mean your thermostat doesn’t know when you want your home to be cool or warm.
It’s like telling your friend to call you at the wrong time – they won’t reach you when you need them.
This can result in discomfort because your home won’t be at the right temperature.
Solution:
Time Needed: 5-10 minutes
Equipment Needed: None
How to Fix:
- Look at your thermostat’s screen. It should show the current temperature.
- Press the buttons to set the temperature you want. Make sure it’s set to “cool” if you want air conditioning or “heat” if you want heating.
- You can also set a schedule if your thermostat has that feature.
- Wait a little while, and your AC or heating should start working as per your settings.
Reason 5: Location Issues
Where your thermostat is placed matters.
If it’s in a spot that gets too much sun, near a heater, or in a drafty area, it can’t accurately sense the temperature in your home.
Imagine if your thermometer was placed outside in the hot sun all day.
It would give you the wrong temperature readings, just like your thermostat placed in a bad spot.
As a result, your AC or heating system won’t know when to work correctly.
Solution:
Time Needed: 15–20 minutes
Equipment Needed: Screwdriver, level (optional)
How to Fix:
- Look at where your thermostat is on the wall. Is it in direct sunlight, near a heater, or in a drafty area?
- If yes, ask an adult to help you move it to a better spot. A cooler, shaded area is usually best.
- Use a level to make sure it’s mounted straight on the wall.
- Turn the power back on, and your thermostat should work better in its new location.
Reason 6: Outdated or Malfunctioning Thermostat
If your thermostat is old or not working correctly, it’s like using an outdated computer or a broken toy – it won’t perform its functions effectively.
An old or malfunctioning thermostat may not be able to communicate with your AC or heating system as it should.
It’s like having a phone with a cracked screen – you can’t use it properly.
This can lead to inconsistent temperatures in your home.
Solution
Time Needed: 30 minutes to 1 hour
Equipment Needed: New thermostat (compatible with your system), screwdriver, wire strippers (if available)
How to Fix:
- Turn off the power to your AC and thermostat.
- Remove the old thermostat following the instructions that came with it, or ask an adult for help.
- Install the new thermostat, following the instructions carefully. It usually involves connecting wires and mounting it on the wall.
- Turn the power back on and follow the setup instructions for your new thermostat.
- Your new thermostat should work correctly now.
Video if your AC thermostat does not work
What to do if AC thermostat not working after power outage
If your AC thermostat is not working after a power outage, you can follow these steps to troubleshoot and potentially resolve the issue:
- Check the Power Supply:
- Ensure that the thermostat is receiving power. Check if it’s properly plugged in or if the batteries (if applicable) are working. Power outages can sometimes affect the thermostat’s settings.
- Reset the Thermostat:
- Many thermostats have a reset button or a reset option in their settings menu. Try resetting the thermostat to its default settings and reconfigure it according to your preferences.
- Inspect Circuit Breaker or Fuse Box:
- Power outages can trip circuit breakers or blow fuses. Check your home’s circuit breaker panel or fuse box to see if the circuit that powers the AC and thermostat needs to be reset or if a fuse needs replacing.
- Check for Display Issues:
- If the thermostat display is blank or not responding, it might be a display issue. Check if the backlight settings are correct or if there are any error codes displayed that can help identify the problem.
- Reconnect Wi-Fi (If Applicable):
- If your thermostat is connected to your home’s Wi-Fi network, it may need to be reconnected after a power outage. Access the thermostat’s app or settings menu to re-establish the connection.
- Consult the User Manual:
- Refer to the thermostat’s user manual or online documentation for specific troubleshooting steps. Manufacturers often provide guidance on common issues and how to resolve them.
- Call a Professional:
- If you’ve tried the above steps and your thermostat is still not working, it may be a more complex issue. In such cases, it’s best to contact a professional HVAC technician to diagnose and repair the problem.
In summary, if your AC thermostat is not working after a power outage, start by checking the power supply, resetting the thermostat, and inspecting your circuit breaker or fuse box.
If the issue persists, consult the user manual and consider seeking professional help if needed.
It’s important to ensure your thermostat is functioning correctly to maintain indoor comfort.
AC thermostat not working symptoms
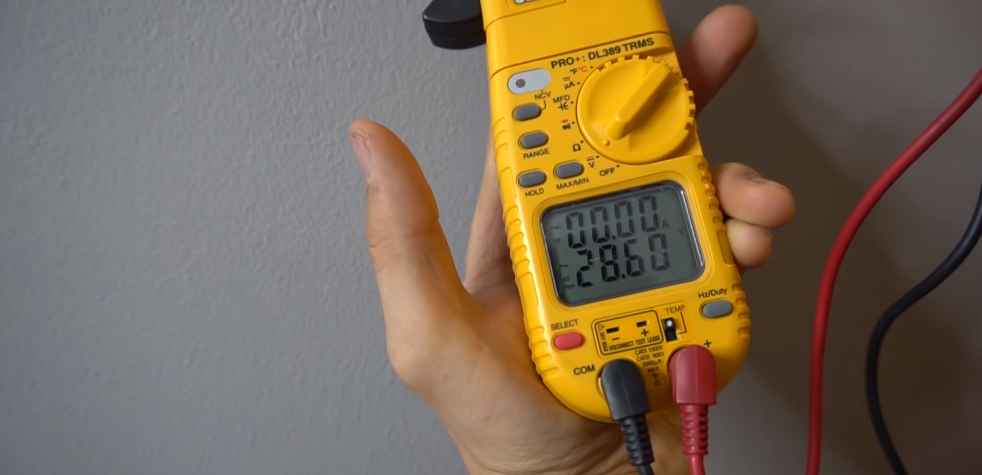
Here are common symptoms of an AC thermostat not working, each explained in detail:
1. Blank or Unresponsive Display:
If your thermostat’s display is blank or unresponsive, it typically indicates an issue with the thermostat’s power supply.
This can occur due to a power outage affecting the thermostat, drained batteries (if your thermostat uses them), or a malfunction within the thermostat itself.
To address this, check and replace batteries if needed, reset the thermostat, and ensure the power source is functioning correctly.
If the display remains blank, further troubleshooting or professional assistance may be necessary.
2. Inaccurate Temperature Reading:
An inaccurate temperature reading on your thermostat can lead to inefficient heating or cooling.
This symptom is often caused by a malfunctioning temperature sensor within the thermostat.
When the sensor fails, it cannot accurately gauge the room’s temperature, leading to incorrect system operation.
To resolve this issue, consider calibrating or replacing the thermostat, ensuring that it accurately reflects the room’s temperature.
3. Inconsistent Cooling or Heating:
Inconsistent operation of your HVAC system, such as it not turning on or off as expected, points to a communication problem between the thermostat and the HVAC unit.
The thermostat may not be effectively relaying commands to the system, causing it to cycle improperly.
To address this, check thermostat wiring and connections.
If necessary, consult a professional to diagnose and repair any communication issues.
4. No Cooling or Heating:
When your HVAC system fails to produce cool or warm air, it can be due to various factors.
A malfunctioning thermostat, power supply problems, or incorrect wiring can all prevent your HVAC system from receiving the necessary signals to operate.
It’s essential to inspect the thermostat settings, power sources, and wiring to identify the root cause.
If troubleshooting doesn’t resolve the issue, seek professional assistance to diagnose and fix the problem.
5. Constantly Running HVAC System:
A constantly running HVAC system without reaching the desired temperature can result from a thermostat misconfiguration or a malfunction.
Check the thermostat settings to ensure they align with your comfort preferences and that the desired temperature is correctly programmed.
If the problem persists, it may indicate a thermostat issue or wiring problem, which should be examined and addressed by a qualified technician.
AC thermostat not working on auto – Easy Fix
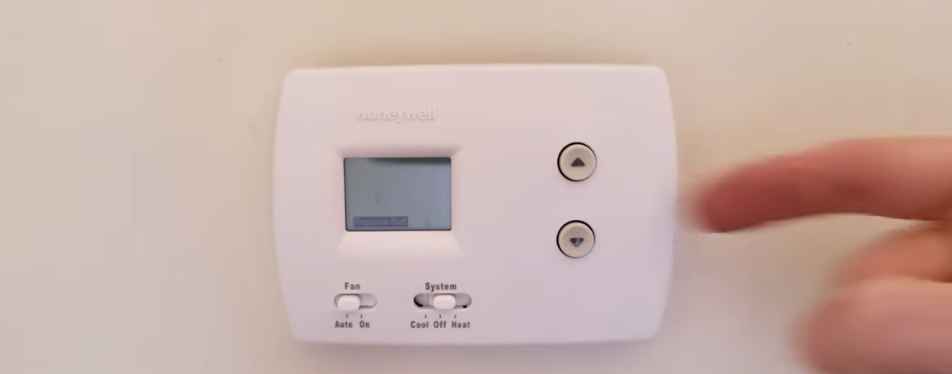
Here are the solutions for fixing an AC thermostat not working on the “auto” setting.
Check the Fan Setting:
If your AC thermostat isn’t working on the “auto” setting, the first thing to check is the fan setting.
Sometimes, the thermostat may be set to “auto” for cooling, but the fan setting is set to “on.”
When the fan is set to “on,” it runs continuously, regardless of whether the cooling cycle is active.
To resolve this issue, make sure the fan setting is also set to “auto” so that it only runs when the cooling system is actively cooling.
This adjustment can help ensure that your thermostat operates correctly in the “auto” mode.
Clean or Replace Air Filters:
Another common issue that can affect the “auto” mode of your AC thermostat is dirty or clogged air filters.
Dirty filters restrict airflow, making it difficult for the thermostat to reach the desired temperature.
Regularly cleaning or replacing air filters is essential to maintain proper airflow in your HVAC system.
By ensuring good airflow, you can prevent the thermostat from struggling to maintain the desired temperature when set to “auto.”
Check for Thermostat Mode:
Ensure that your thermostat is set to the correct mode.
If you want cooling to occur on the “auto” setting, the thermostat should be set to “cool” or “AC” mode.
Sometimes, users accidentally set the thermostat to “heat” or another mode, which prevents the cooling system from activating when needed.
Double-checking the thermostat mode is a simple step to ensure it functions correctly in the “auto” mode.
Inspect the Thermostat Programming:
Review the thermostat’s programming to confirm that it’s correctly configured to reach the desired temperature when set to “auto.”
Check the temperature settings and any schedule you may have set.
Ensuring that the thermostat is programmed to operate as intended in the “auto” mode is crucial for its proper functioning.
Reset the Thermostat:
In some cases, a simple reset can resolve minor issues affecting the “auto” mode.
Reset your thermostat to its default settings and reprogram it according to your preferences.
This reset can clear out glitches or errors that might be causing problems with the “auto” setting, restoring proper operation.
Replace the Thermostat Batteries:
If your thermostat operates on batteries, low or dead batteries can lead to malfunctions.
Replace the batteries with fresh ones and check if this restores the “auto” mode’s functionality.
Battery replacement is a straightforward solution that can help ensure your thermostat operates correctly.
Check for Wiring Issues:
Inspect the thermostat’s wiring for any loose or damaged connections.
Wiring problems can disrupt the thermostat’s operation, including the “auto” mode.
If you’re uncertain about wiring or encounter issues, it’s advisable to consult a professional HVAC technician who can thoroughly examine and repair any wiring problems.
Upgrade or Replace the Thermostat:
If all troubleshooting efforts fail and the thermostat continues to have issues with the “auto” setting, consider upgrading or replacing it.
Newer thermostats often come equipped with advanced features and improved reliability, offering a long-term solution to any persistent problems.
AC thermostat not showing correct temperature – Solutions
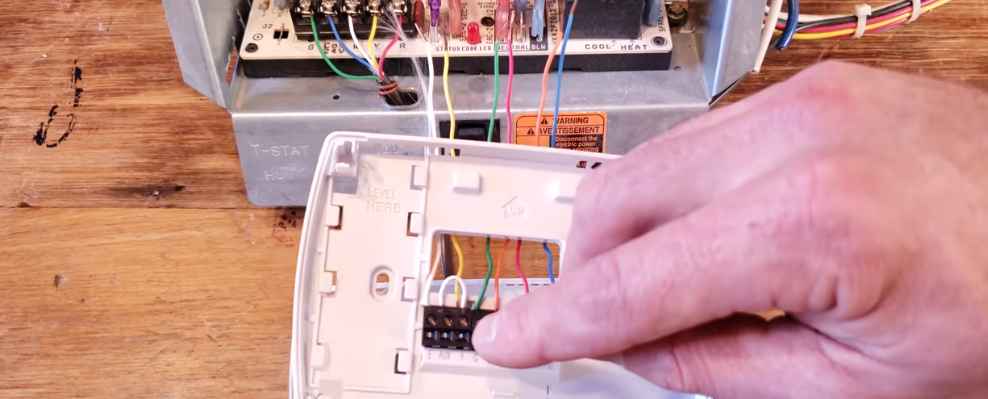
Here are solutions for addressing an AC thermostat that is not showing the correct temperature.
Check for Placement and Exposure:
The placement of your thermostat can significantly impact its ability to accurately measure room temperature.
Ensure that the thermostat is not exposed to direct sunlight, drafts, or heat sources like lamps or electronics.
These factors can lead to inaccurate readings.
Additionally, make sure there are no obstructions, such as curtains or furniture, blocking the thermostat’s sensor.
Proper placement can help it provide more accurate temperature readings.
Calibrate the Thermostat:
Some thermostats allow for calibration adjustments to correct temperature discrepancies.
Refer to your thermostat’s user manual or online documentation to see if calibration is an option.
Calibration enables you to fine-tune the thermostat’s temperature reading to match a more accurate reference, such as a separate thermometer.
This can help align the thermostat’s display with the actual room temperature.
Replace the Thermostat Batteries:
Low or failing batteries in your thermostat can affect its performance, including temperature accuracy.
If your thermostat operates on batteries, replace them with fresh ones.
Adequate battery power is essential for the thermostat to function correctly and provide accurate temperature readings.
Inspect and Clean Temperature Sensor:
Dust and debris can accumulate on the thermostat’s temperature sensor, leading to inaccurate readings.
Carefully remove the thermostat cover and inspect the sensor for any dirt or buildup.
Gently clean it with a soft brush or compressed air to ensure it can accurately sense the room temperature.
Be cautious when cleaning to avoid damaging the sensor.
Verify Wiring and Connections:
Loose or faulty wiring connections can impact the thermostat’s ability to communicate with your HVAC system and accurately control temperature.
Examine the thermostat’s wiring, ensuring that all connections are secure and properly seated.
If you find any damaged wires or connectors, consider having them repaired or replaced by a professional HVAC technician.
Consider an Upgraded Thermostat:
If your thermostat consistently provides incorrect temperature readings despite troubleshooting efforts, you may want to consider upgrading to a newer and more advanced thermostat.
Modern thermostats often come equipped with enhanced temperature sensors and features that improve accuracy and overall performance.
Upgrading to a newer model can provide a long-term solution to temperature accuracy issues.
Seek Professional HVAC Inspection:
If you’ve tried the above solutions and continue to experience temperature inaccuracies, it’s advisable to consult a professional HVAC technician.
They can perform a comprehensive inspection of your thermostat and HVAC system to diagnose and address any underlying issues.
Professional expertise can help identify and resolve complex temperature-related problems effectively.
Thermostat display not working – What to do
When our thermostat’s display isn’t working, follow these steps:
First, check if it’s receiving power and replace batteries if needed.
Next, inspect the circuit breaker for your HVAC system and reset it if tripped. Clean the display gently to remove dirt or smudges.
Try restarting the thermostat, following the manual’s instructions. Examine the wiring to ensure it’s properly connected.
If the problem persists, consider replacing the thermostat.
Sometimes, a malfunctioning display indicates a need for a new thermostat due to wear and tear.
In summary, troubleshoot power, clean the display, and check wiring, resorting to replacement if necessary.
Thermostat not turning on heat – Quick solutions
When your thermostat won’t turn on the heat, follow these quick steps:
- Check the temperature settings; make sure it’s set to a higher temperature than the room.
- Verify the thermostat has power, either by changing the batteries or checking electrical connections.
- Inspect and reset the circuit breaker if it’s tripped.
- Ensure the thermostat is in heating mode and review its programming.
- Clean or replace HVAC filters and keep vents unobstructed.
- Check the thermostat’s location for accuracy.
- Examine wiring for any loose connections.
- Try restarting the thermostat following the manufacturer’s instructions.
- If the issue persists, consult a professional HVAC technician for further assistance.
How to fix a thermostat on the wall – Step by Step
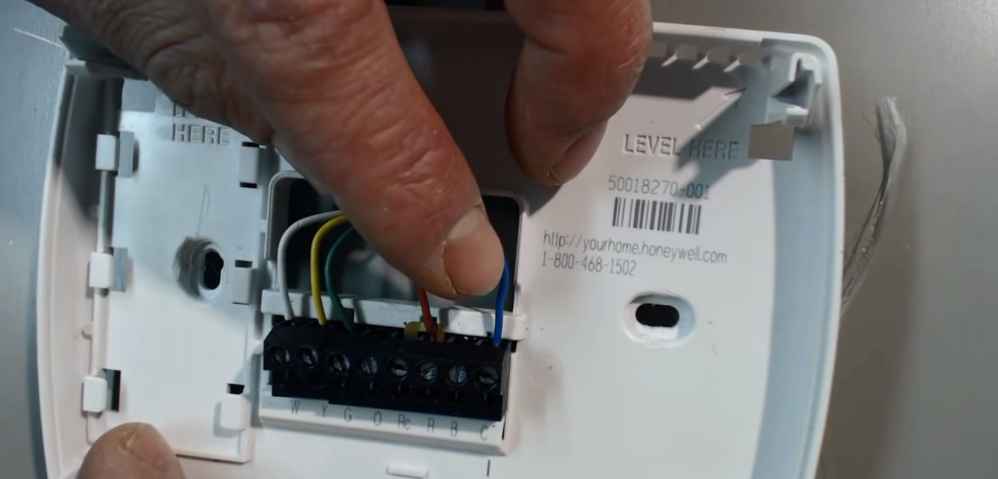
Here are the step-by-step instructions for fixing a thermostat on the wall:
- Turn Off Power: Before you begin, turn off the power to your heating and cooling system at the circuit breaker. Safety first.
- Remove the Old Thermostat: Carefully remove the old thermostat from the wall. It’s usually attached with screws or clips. Once removed, you’ll see a set of wires connected to it.
- Label Wires: Before disconnecting any wires, it’s crucial to label them. Use stickers or masking tape to mark each wire according to its terminal designation (e.g., R, G, Y, W, C).
- Disconnect Wires: Gently disconnect the wires from the terminals. If the wires are frayed or damaged, you may need to trim and strip them for a clean connection.
- Mount the New Backplate: Attach the new thermostat’s backplate to the wall using the provided screws and anchors. Ensure it’s level and secure.
- Connect Wires to New Thermostat: Refer to the new thermostat’s manual for wiring instructions. Connect each wire to its corresponding terminal on the new thermostat. Follow your labels to ensure the correct connections.
- Attach the Thermostat: Carefully attach the new thermostat to the backplate, aligning it with the terminal screws.
- Power On: Turn the power back on at the circuit breaker.
- Program and Test: Set up the new thermostat according to your preferences, including temperature settings and schedules. Test it to ensure it’s functioning correctly by adjusting the temperature and observing your heating or cooling system’s response.
- Final Check: Make a final check to ensure that all wires are securely connected, and there are no loose parts.
- Seal Any Holes: If the new thermostat doesn’t cover all the holes left by the old one, use caulk or a filler to seal them neatly.
- Dispose of Old Thermostat: Dispose of the old thermostat and any removed parts following your local regulations, as some older thermostats contain hazardous materials like mercury.
Honeywell thermostat not working – Reasons and Solutions
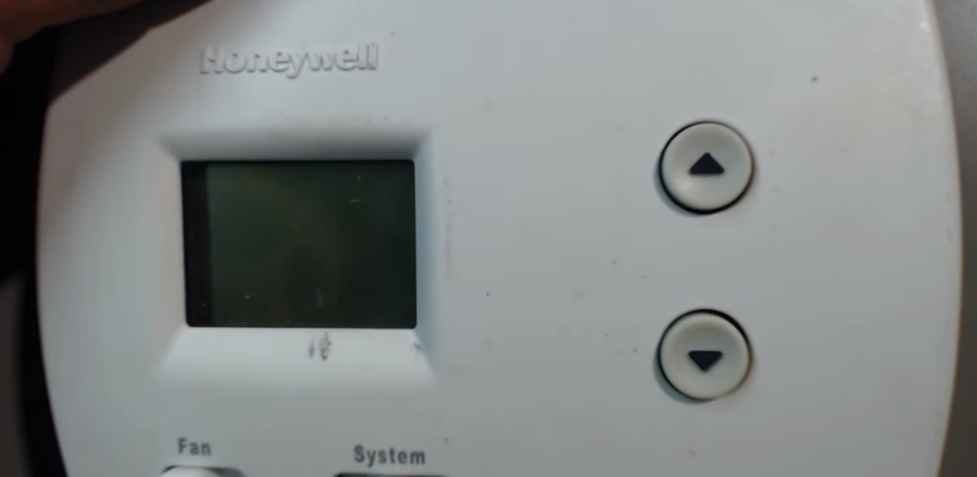
A Honeywell thermostat not working can be attributed to several reasons.
First, check the power source; dead batteries or a lack of electrical connection can cause it to fail.
Additionally, a tripped circuit breaker can disrupt its operation.
Ensure the thermostat is set to the desired temperature and mode, as incorrect settings can prevent it from functioning properly.
Dirty or damaged wiring may also be the culprit, so inspect and clean wires as needed.
Finally, if all else fails, a malfunctioning thermostat might require replacement.
To fix this issue, replace batteries, reset the circuit breaker, adjust settings, clean wiring, and if necessary, consider a new thermostat installation for optimal performance
Frequently Asked Questions related to AC Thermostat Not Working
Q: Is it necessary to replace the thermostat when upgrading to a new HVAC system?
A: Not always, but it’s recommended to ensure compatibility and maximize efficiency.
Q: My thermostat is set, but the AC doesn’t turn on. What’s wrong?
A: Ensure that the thermostat mode is set to cooling and the temperature is lower than the room’s current temperature.
Q: What should I do if my thermostat screen is blank?
A: Check the batteries first; if they’re fine, there might be a wiring issue or a blown fuse in your HVAC system
Q: How often should I replace thermostat batteries?
A: Change them annually or when you see a low battery warning.
Q: Is it normal for the thermostat to click when it starts or stops the AC?
A: Yes, clicking sounds are typical as the thermostat cycles the HVAC system.
Wrapping up
In conclusion, understanding the common issues that can cause your AC thermostat to malfunction is crucial for maintaining a comfortable and energy-efficient home environment.
This knowledge empowers you to diagnose and resolve problems swiftly, ensuring your HVAC system operates seamlessly.
From dead batteries and incorrect settings to wiring complications and sensor calibration, the reasons behind thermostat issues vary.
However, the solutions are often straightforward.
Regular maintenance, such as cleaning and battery replacement, can prevent many problems.
Additionally, positioning your thermostat correctly, ensuring a stable power supply, and consulting professional help when necessary are key steps to ensure your thermostat functions optimally.
By grasping the nuances of thermostat functionality and potential pitfalls, you can enhance your overall comfort, reduce energy consumption, and ultimately enjoy a more efficient and cost-effective cooling and heating experience.